Granting access to your AWS account
In order to grant access to Magebit developers to your AWS account, there are specific preliminary steps required from your side.
Following guidelines on how to keep your AWS account secure, you should NEVER share your root account credentials with anyone. We also recommend setting up two-factor authentication (2FA) on your root account as an extra layer of security if that hasn't been done already.
Instead of sharing IAM user login and password, AWS supports creating IAM roles that allow delegating access to your resources and services to another AWS account — in our case, to Magebit.
Click on one of the methods below to view the steps.
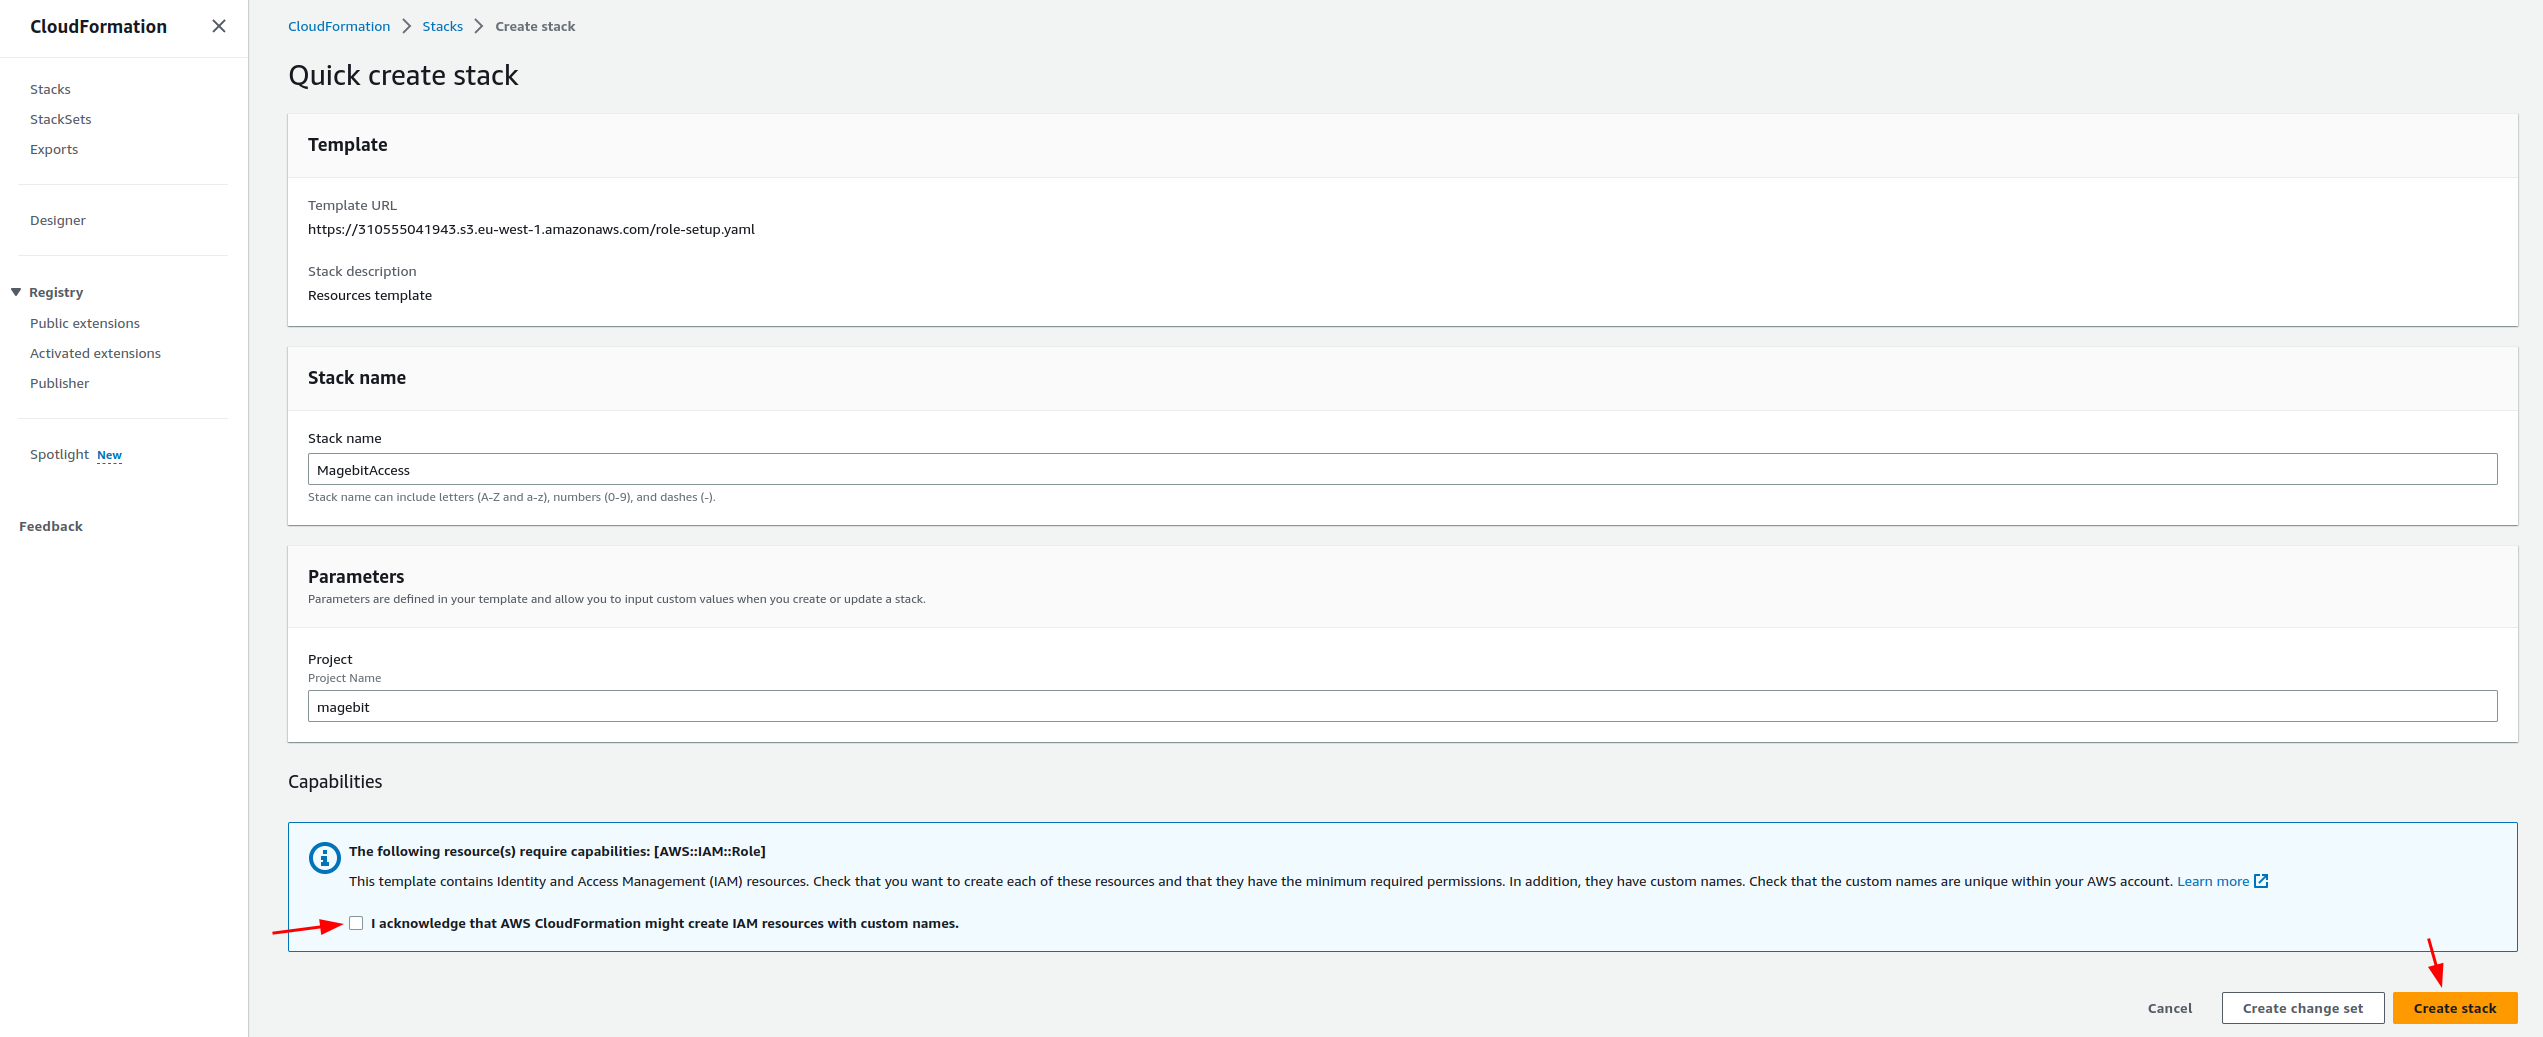
Click here to open CloudFormation template in a new tab
-
Agree that Cloudformation might create IAM resources and proceed to 'Create stack'
-
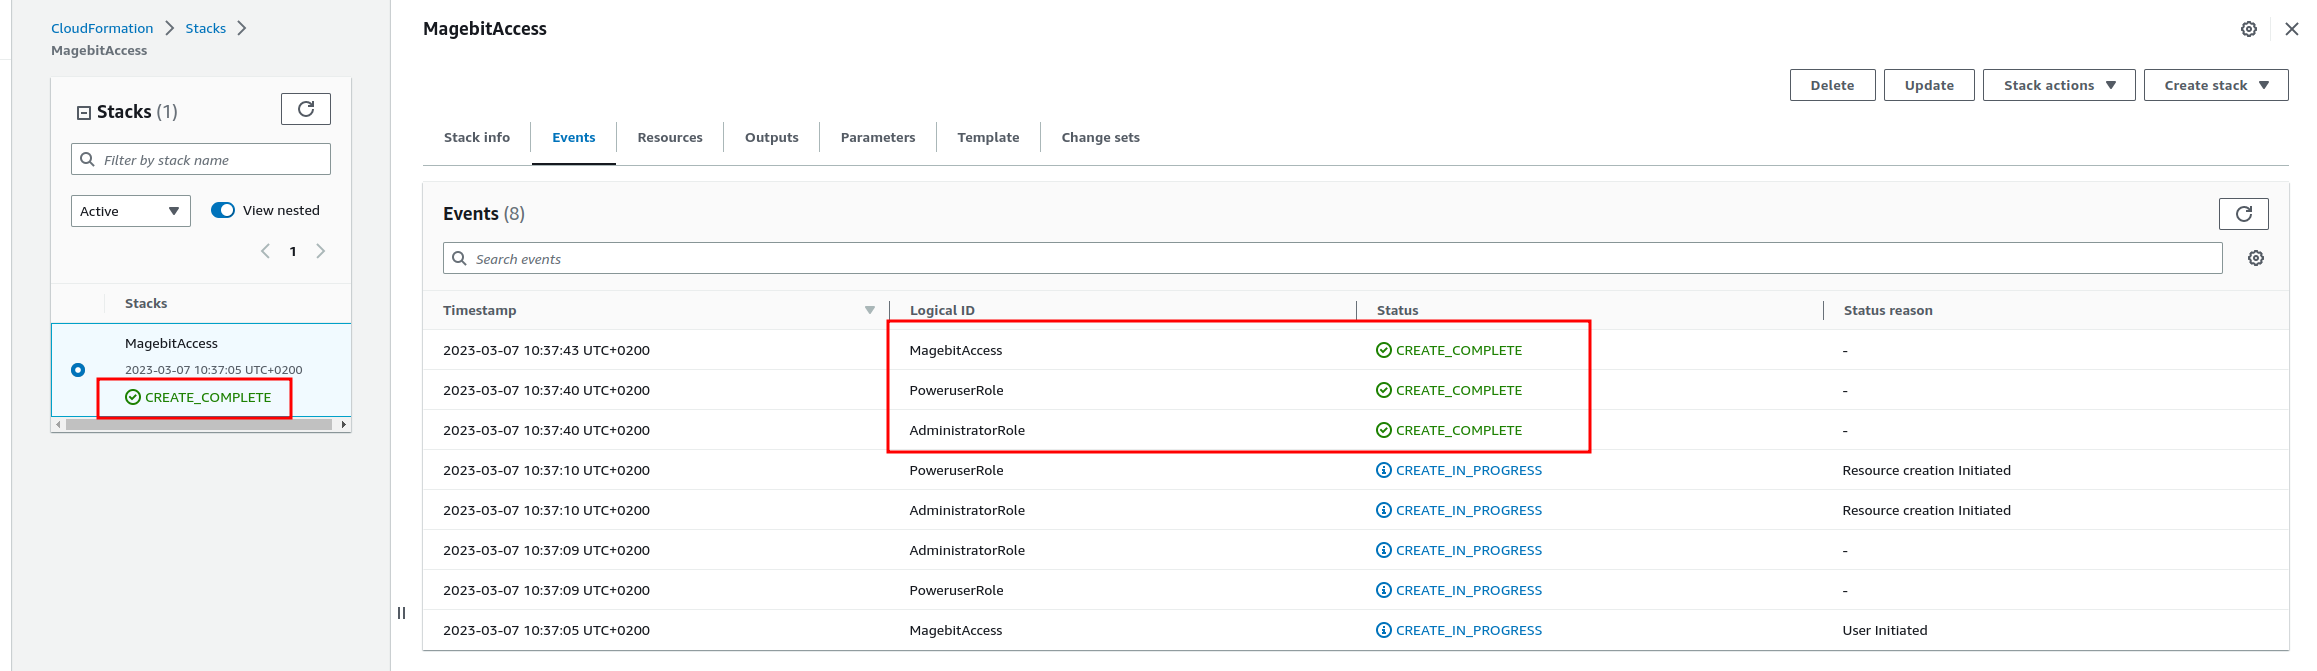
Refresh the page after a while and check if stack is in 'CREATE_COMPLETE' state
-
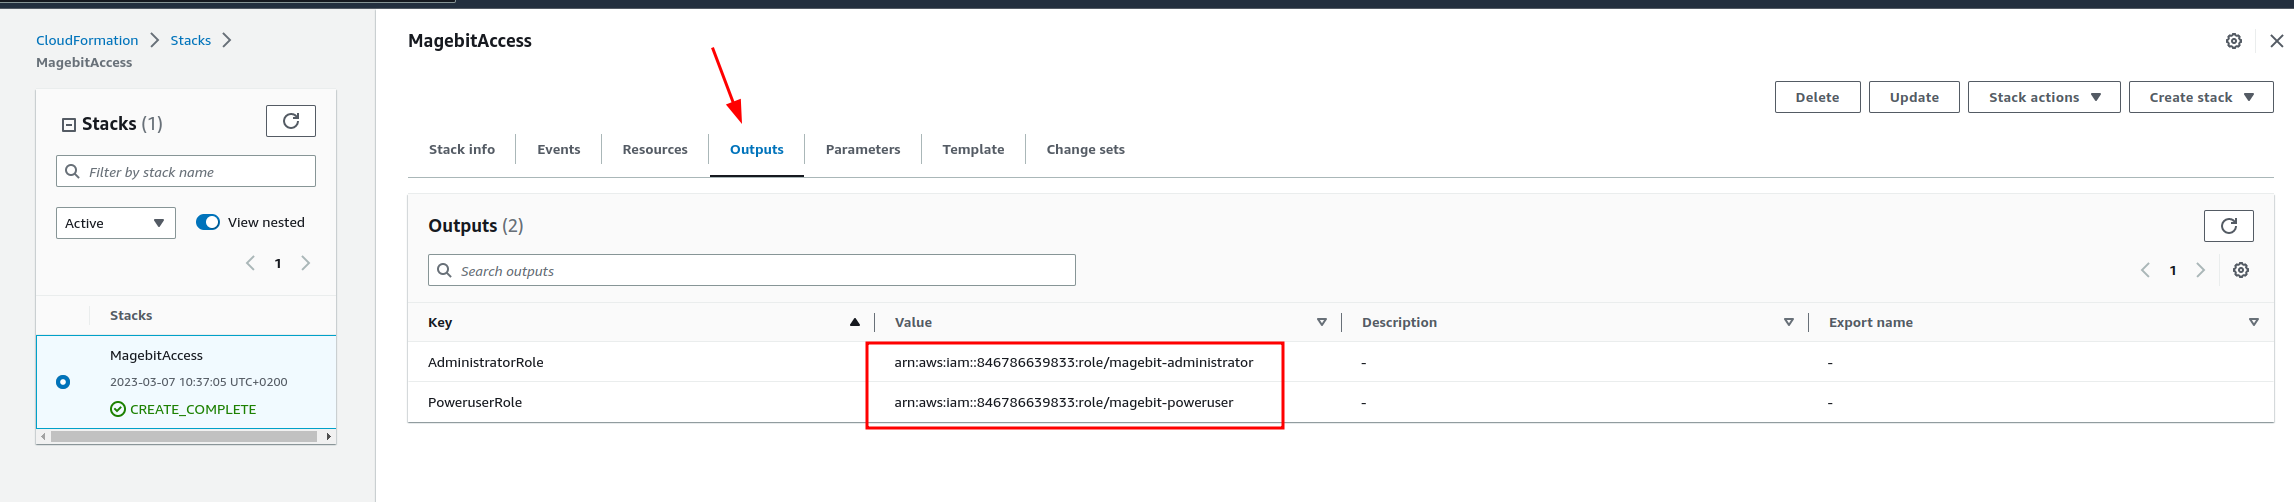
Head to 'Outputs' section and you need to copy both ARN's and send it to us in either a Jira ticket or via email to your designated customer manager.
-
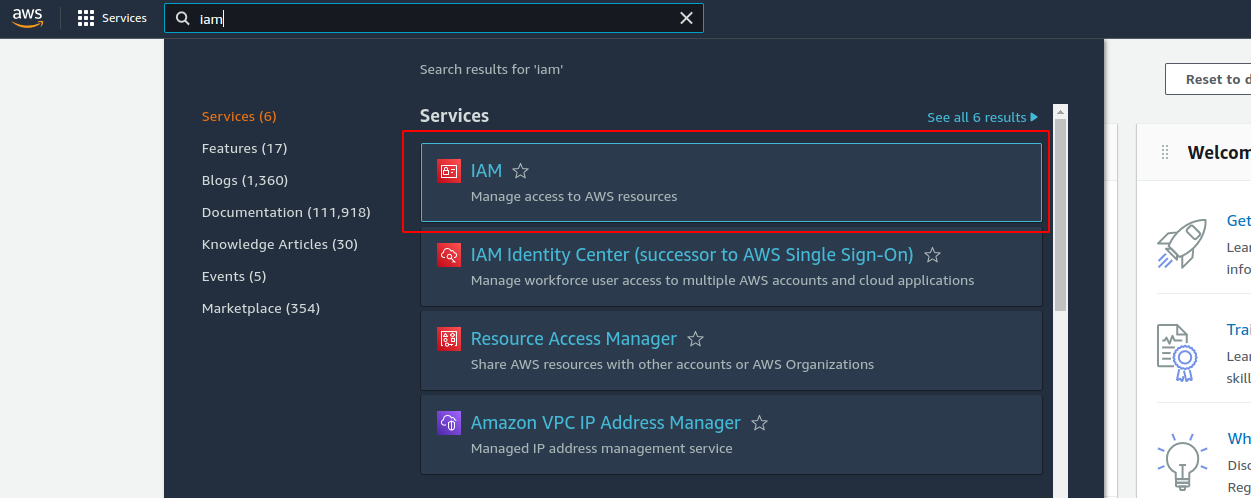
In the upper menu bar, search for and navigate to the 'IAM' service.
-
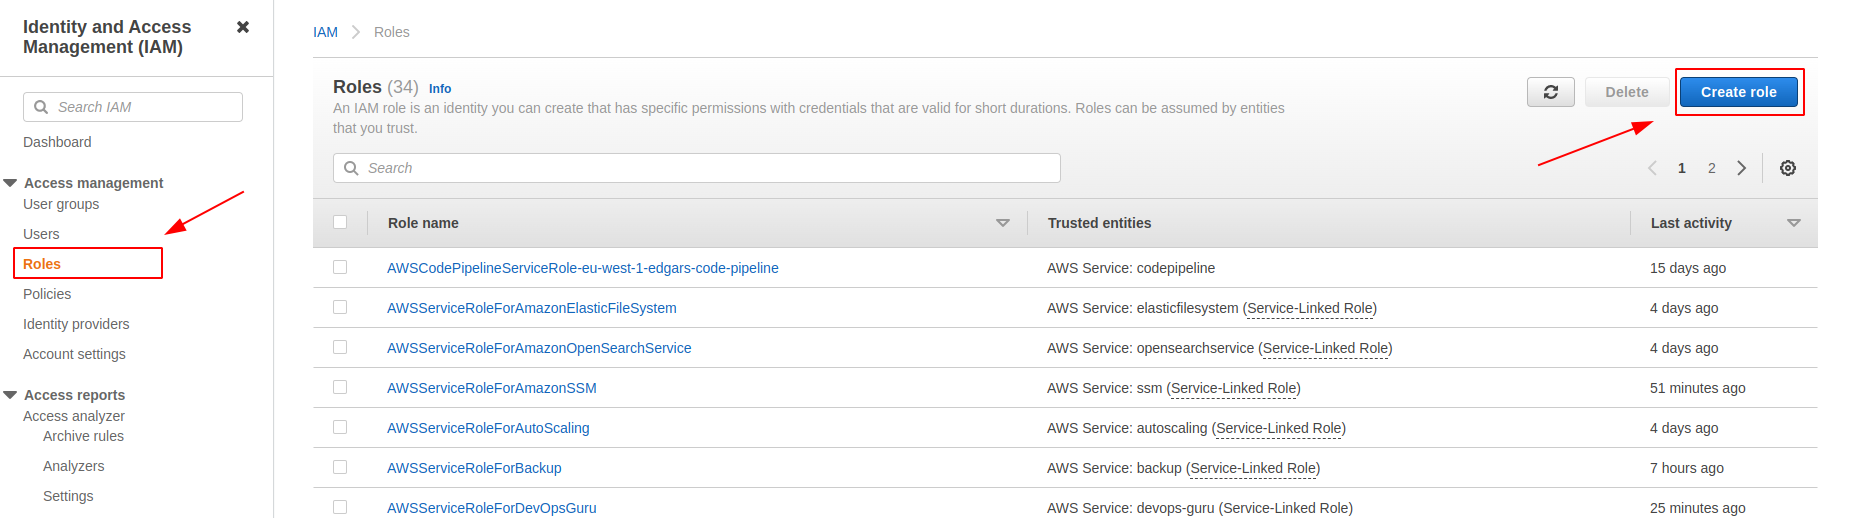
On the right-side menu go to the 'Roles' page, where you will be able to create a new IAM role via the 'Create Role' button.
-
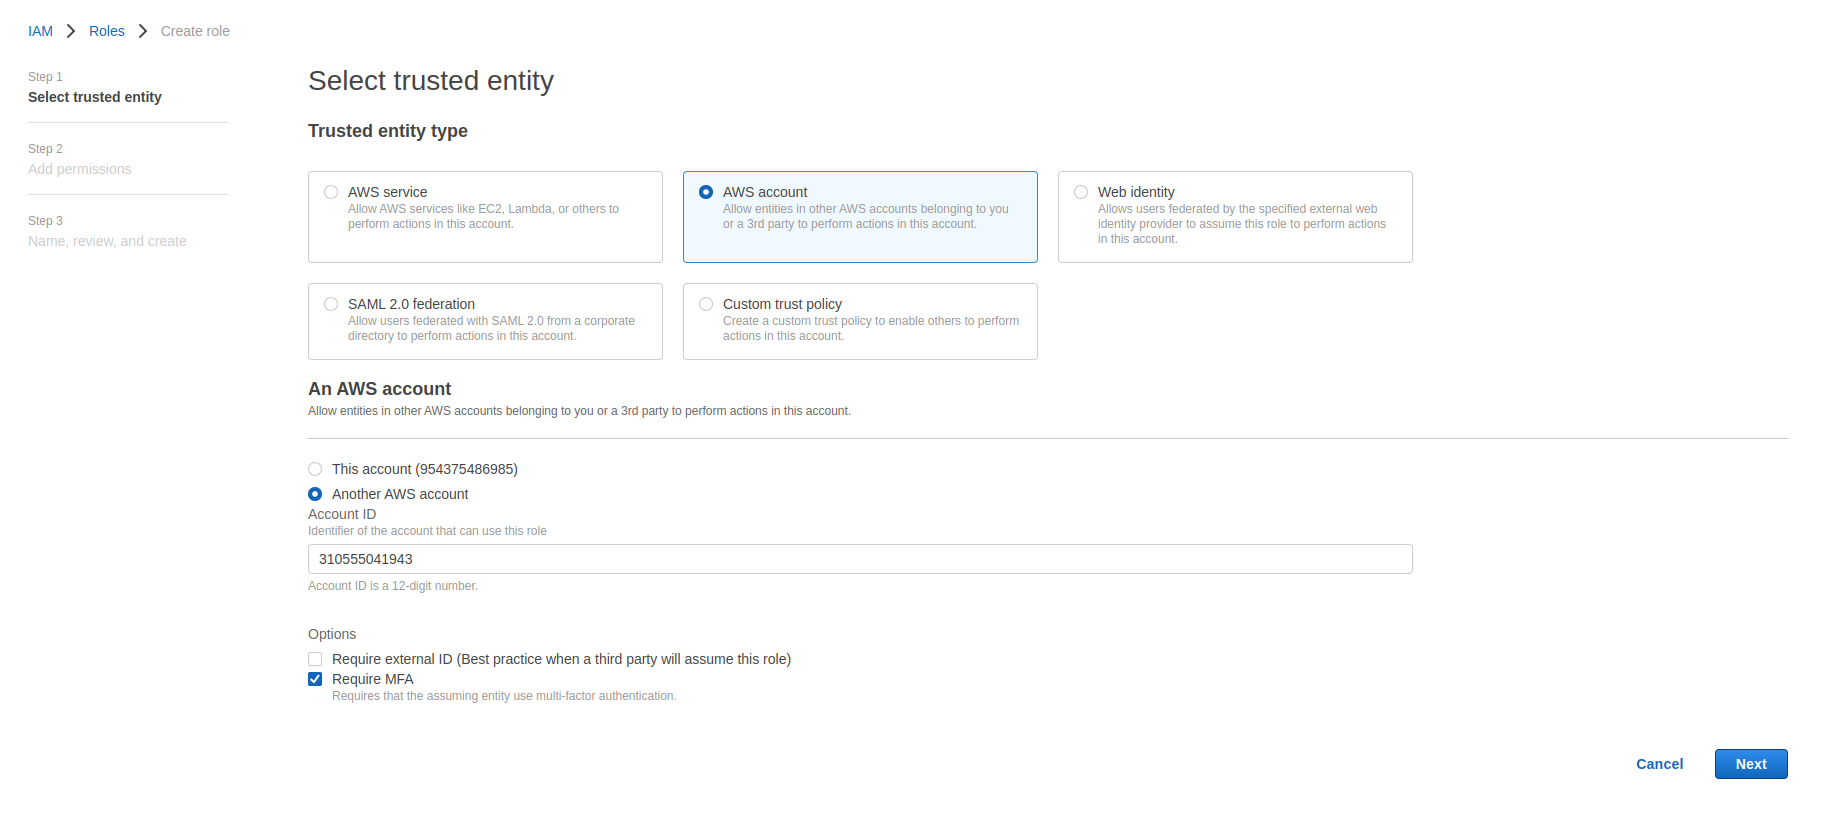
When creating a role, specify 'Trusted entity type' as an AWS account. Then select the 'Another AWS account' option and fill in Magebit's AWS account ID - 310555041943
And at the very bottom, check the 'Require MFA' checkbox. This will require that any entity, trying to assume the role, has 2FA (MFA) enabled.
-
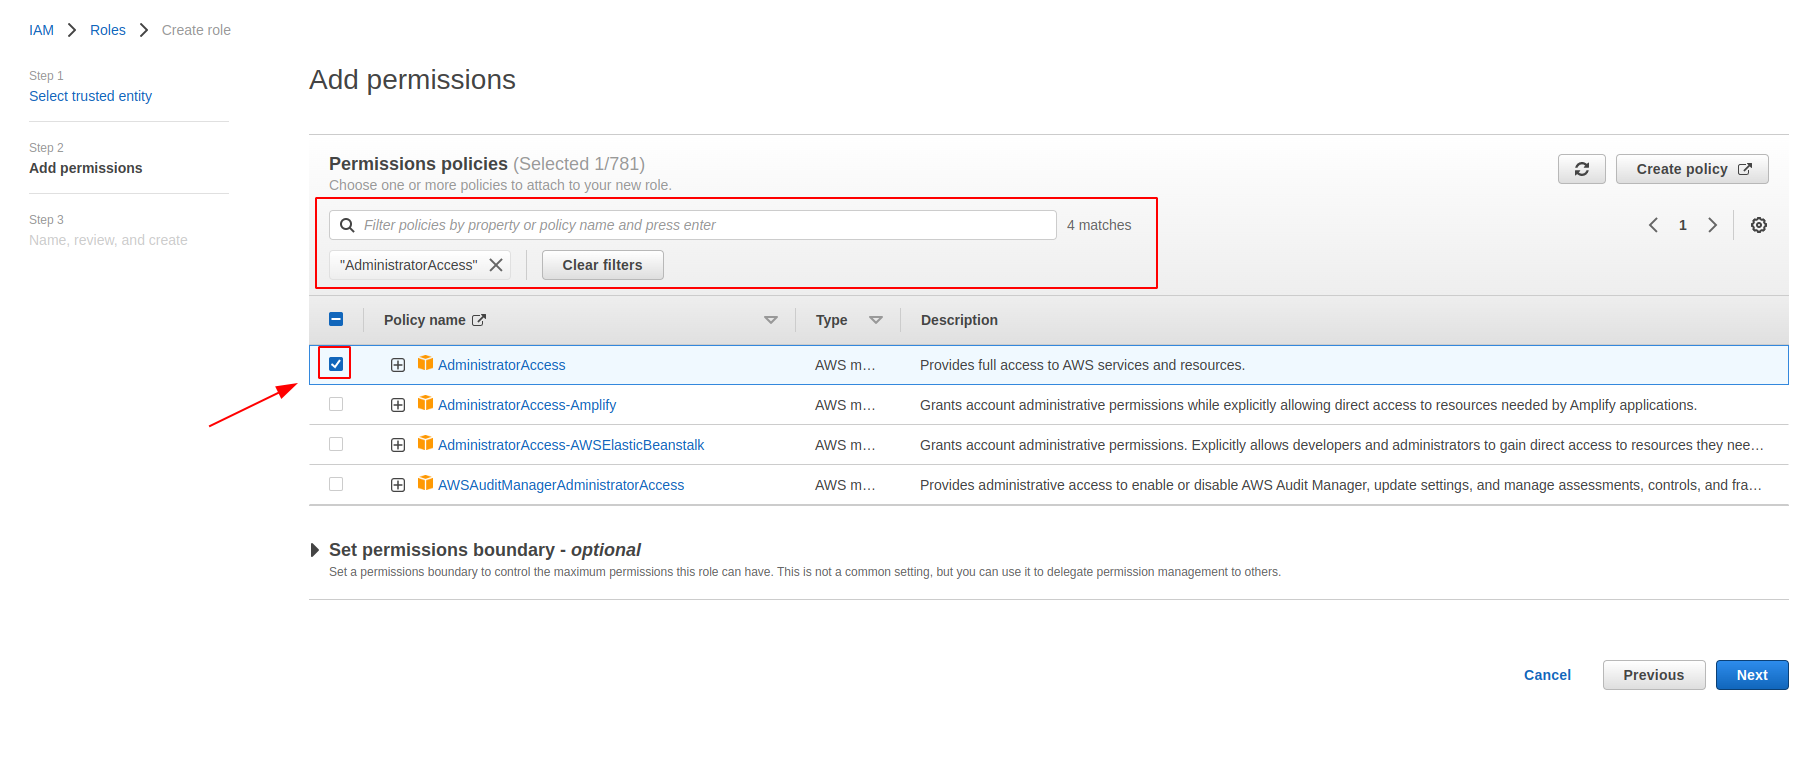
In the Permission step, you need to search for the 'Administrator Access' policy and assign it to the role. This will give us full control over your account. Those permissions will be used ONLY by our AWS cloud experts that will perform additional configuration before granting a limited subset of the necessary permissions to our developers.
-
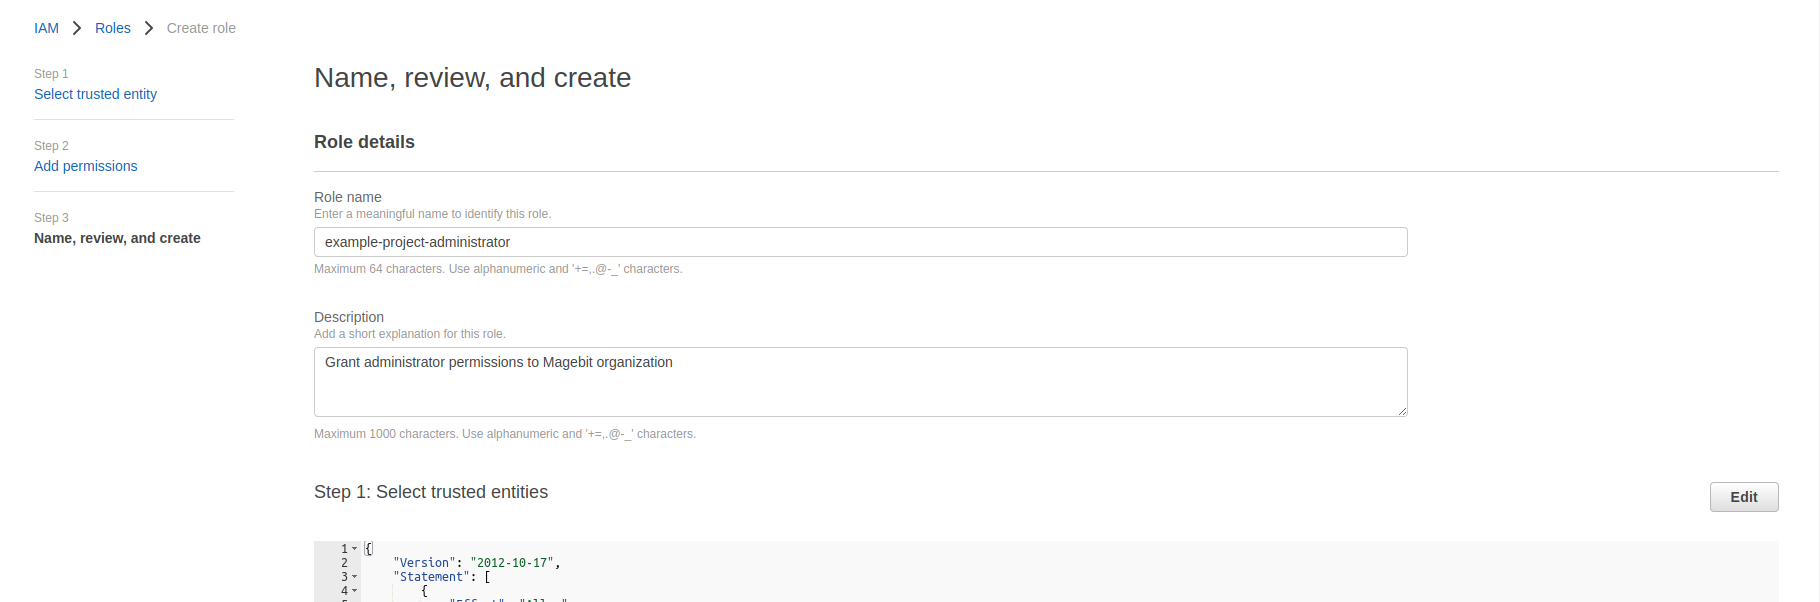
In the Review step, you need to fill out 'Role name' and 'Description'. For the role name, we recommend using the following 'project-name-administrator' pattern, where 'project-name' is your project, but not limited to.
The description field is used to quickly identify and describe for what purpose the role is used. It can be filled with 'Grant administrator permissions to Magebit organization'.
-
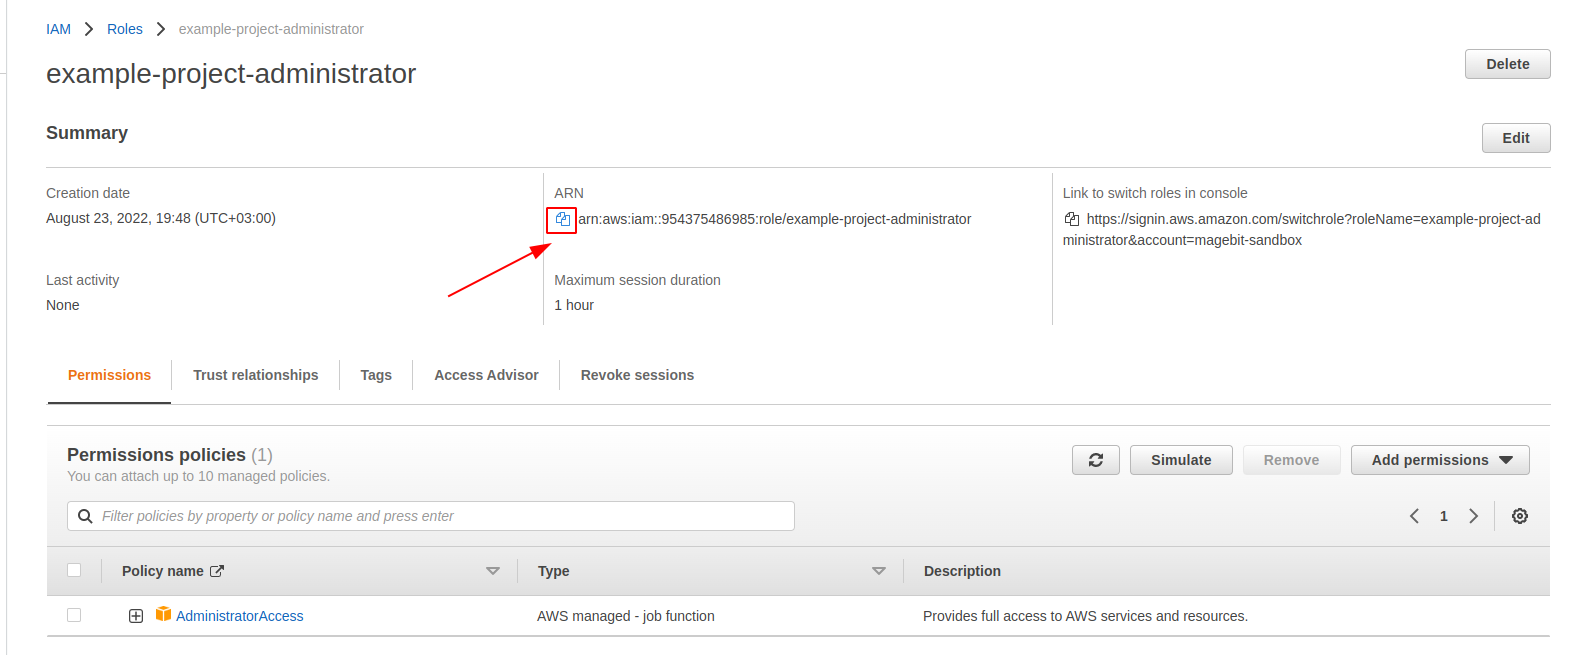
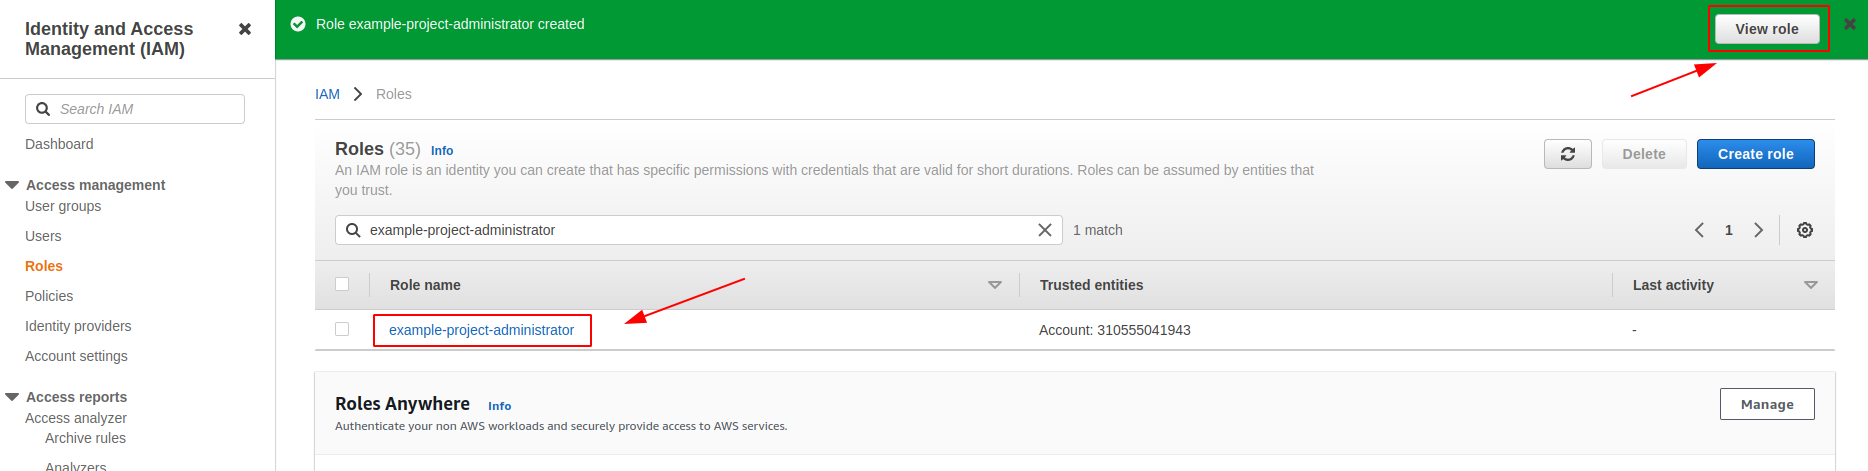
Once the role is created, either click on the 'View role' button in the success message or search for the role by the name you gave in the list.
-
When in the IAM role view page, you need to copy ARN and send it to us in either a Jira ticket or via email to your designated customer manager.